SnowedInn Project - Devlog #01
Disclaimer*
This is mostly for training purposes. Just writing down my thoughts. It's purely about challenging myself in order to know if I'm able to communicate my way of thinking. Especially about game development.
---
I did not make a devlog about my recent project during the last 2 first weeks of it. As a result this one is going to be a bit bigger than the average. Needed to combine the whole 3 weeks of work.
INTRO
Some words about the assignment first.
It's going to be my main environment for this 4th year study at IAD3D school in Montpellier. For this one I decided to make the 3d version of the "SnowedInn" concept from Jeremy Fenske. I always been a fan of his work and had this piece in mind for ages now. You can follow his journey on his artstation page: https://www.artstation.com/artwork/e0zYoP
The project is going to be featured with a dynamic lighting. Art direction has to be realistic and aiming for most of nowadays AAA studios. Medieval / fantasy related topic. Using UE4 4.25.
Some challenges I will be facing would be about reactive snow shader, new texture creation workflow using Zbrush and Substance and most of the complex shaders I will need to blend nicely the assets together in the scene.
MY PROGRESS
Things are going slowly so nothing Fancy for now. I firstly established a whole planning to help me keep motivated and organized.
Here is a sneak peek of the first 2 months.
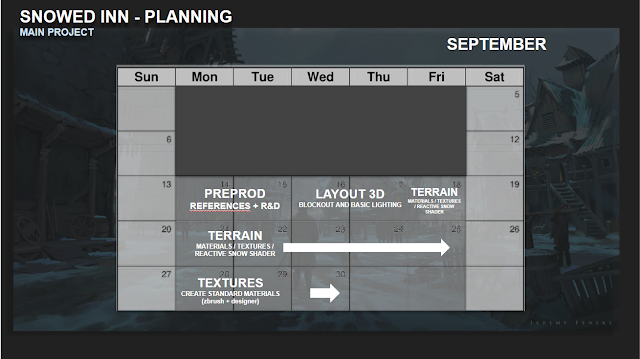

I went quickly on the Preprod period and on the 3D layout. I was able to mark these tasks as done in about 2 days. Gathering a lot of references and techniques I learned on the web. About that. 80lv is a great source of inspiration and learning.
For the blockout I tried to follow as much as possible the original concept made by Jeremy Fenske. To do such thing, I created a small lineart which I used to mark the main structures and align the camera.

TERRAIN CREATION
Terrain as always been a big challenge for me. I think, as an environment artist it's almost required to keep the focus on what is going to be relevant for your design and what is not. In this case the terrain offered me a great opportunity to start with a solid base. Keeping working on a map which is not empty at all is always more motivating in my opinion.
About the shader. I wanted something a bit more complex than the usual. The targeted idea was to come up with a snowy landscape for the village. I searched to leave some snow stamps / footsteps in the snow whenever the player walks in. Like foot trails.
The Terrain is composed in 6 layers overall.
- Snow Powder (The snow powder is a specific layer which adds a bit of elevation in the terrain properties. Wherever you apply this layer you will increase the height of the terrain)
- Snow Default (Same textures as the snow powder without terrain distortion)
- Snow Footprints (Perfect layer to blend between the dirt roads and the snow)
- Snow Rough (A bit more contrast in the snow texture, giving it more density)
- Dirt (Made for the village roads where people are constantly passing through)
- Ice (A bit of variety to make some lakes or other effects, blends perfectly with the rest)
All the layers are combined together in a single shader and offer a perfect control over the terrain. That is to say you can have access to some features as:

- Distance Based Tling Amount: allow the user to set the distance where the UV will increase and break the repetition.
- Tiling Far: Set the tiling to the far distance
- Tiling Near: Set the default tiling near to the player
- Displacement strengh: Adjusts the displacement strengh
- Snow Powder Height Amount: Increases the maximum height of the snow powder layer.
- Snow Powder Height Contrast: Sets the contrast between the snow powder layer from the others.


About the footprints. Currently it's in a state where it's stable and working along the project. The system is placing decals following the player movements. For FPS issues I destroyed the decals over the time. Around 12 second lifetime or over a distance of 2000 from the player they kill themself and free some performances. Even if it's working I still need to find a better strategy to increase the global framerates of the game.
At this point, the scene can count over 2k+ decals which cut the performances by 40 FPS before they start to vanished.
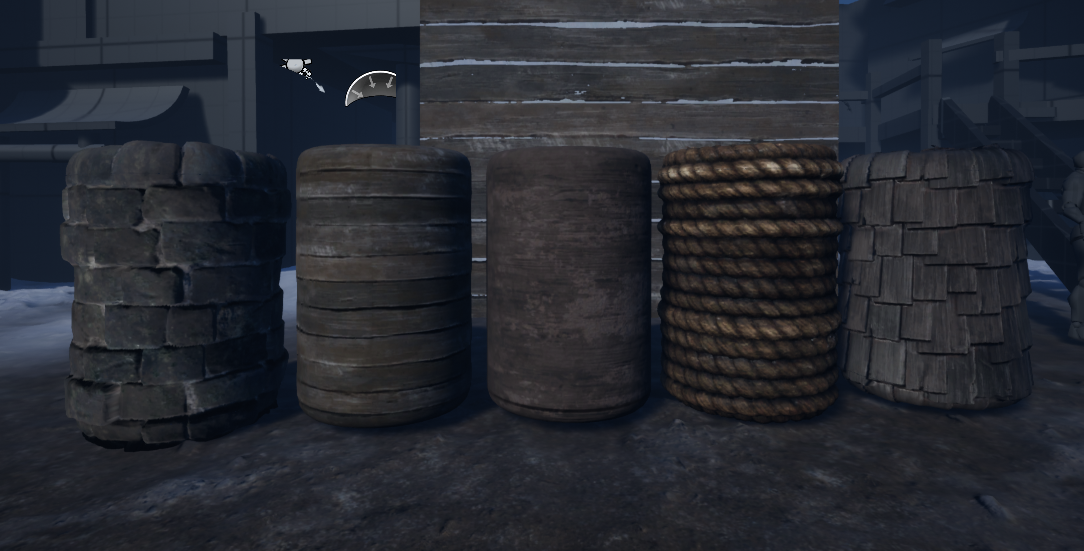
MATERIAL BLENDING
I've spent a lot of time doing a master material allowing me to blend assets like rocks, walls and many more with the landscape. The process is using the new Realtime Virtual Texture (RVT) to grab the landscape texture onto the surface of the mesh.
The RVT is applied on a mask which is currently defined by the contact of the mesh edges and the landscape surface.
I've also done a lot of variables to let me control this mask depending on the mesh I like to blend.
This is pretty effective and works very well for now.
My only notable issue remains the calculation of the mask when the terrain is set with the snow powder layer. But I'll see that later.


- Wooden Planks
- Generic Wood
- Roof top
- Cobblestone and Plaster (mix)
- Straw
- Ropes

I'm still planning how to build the generic buildings with it or with a UV 2 pipeline.

Well done, Stéphane! You did such a great job combining 3 weeks of work on this page. As I was reading I was thinking of how interesting it is to follow the making of a project, to see all the different steps and understand its references. I am glad this blog is becoming such a useful tool for you.
RépondreSupprimerIt's definitely a good way for you to keep track of what has been done and to force yourself to articulate your thoughts. It's amazing how much it takes to just create footsteps!
You're writing is clear, it has a good flow and it's dynamic. I like the way you keep it lively and you go straight to the point. Although I'm not a specialist in your field I could easily follow what was going on.
I'd like us to spend some time next week to review a few things together!
I really want to improve the turn of my phrases in terms of vocabulary and syntax. I need them to be smoother and smarter. As if they were written by a native speaker. In a professional way I need to be transparent, not recognizable. Any advices how to improve this?
SupprimerI also like the fact that you talk about your successes but also the difficulties you've been facing and how you overcame them.
RépondreSupprimerAgain, it's interesting to see the process!